Setup Guide
How to Fix Fret Buzz Without a Luthier: A Step-by-Step Guitar Setup Guide
By David Aitken · The Complete Guitar · Dundee, Scotland
Fret buzz is one of those problems that makes you question whether your guitar is broken. I hear it almost every week from players who bring instruments to me — "there's a buzz, it doesn't sound right, something's wrong with the neck." Nine times out of ten, the cause is a straightforward setup issue: the neck relief is out, the action has dropped too low, or the nut slots have worn down over time. None of these require specialist bench equipment, and none of them require paying someone like me to fix. This guide walks through each cause in the correct adjustment order so you can diagnose and fix fret buzz at home, usually in about thirty minutes.
I've been setting up guitars on my own workbench for years, and the single biggest lesson I've learned is this: the order matters more than the individual adjustment. Get the sequence right, and everything falls into place. Get it wrong, and you'll chase your tail for hours.
Why Fret Buzz Happens (And Why You Should Fix the Root Cause, Not the Symptom)
The Three Root Causes
Fret buzz occurs when a vibrating string makes contact with a fret other than the one being pressed. Three structural variables control whether this happens: (1) neck relief — the slight forward bow in the neck that creates clearance for the string's vibration arc; (2) string action — the distance between the bottom of the string and the top of the fret crown; and (3) nut slot depth — the height at which the string sits at the very first fret. These three variables interact with each other, which is why adjusting them in the wrong order wastes time. The correct sequence is always: neck relief first, then action, then nut.
The Most Common DIY Mistake
Raising the action to mask a bad neck relief is the single most common mistake I see players make at home. I understand the instinct — the strings are buzzing, so you raise them until the buzz stops. But what you've actually done is trade fret buzz for a guitar that's physically harder to play. The strings sit too far from the fretboard, your fretting hand has to work harder, finger fatigue sets in faster, and your technique slows down. If you find yourself cranking saddles higher and higher and the guitar still doesn't feel right, the problem is almost certainly upstream — in the neck relief. Fix the relief first, then dial the action back to where it should be for your playing style.
Step 1 — Check and Adjust Neck Relief
What Is Neck Relief?
Neck relief is the slight forward curvature of the guitar neck, and it exists for a reason. When you pluck a string, it doesn't vibrate in a flat line — it swings in an elliptical arc, widest at the middle of the string's length. The neck needs a small amount of forward bow to accommodate that arc. Too flat (or back-bowed), and the strings buzz against frets in the lower positions because there's no room for the vibration. Too much relief, and the action feels high and sluggish through the mid-neck registers.
The ideal relief measurement for most electric guitars is 0.010–0.015 inches (0.25–0.38 mm), measured at the 8th fret while holding down the 1st fret and the last fret simultaneously. Acoustic guitars typically tolerate slightly more relief: 0.012–0.020 inches. You can measure this with a feeler gauge slid under the string at the 8th fret — it's a cheap tool and well worth keeping in your case.
How to Adjust the Truss Rod
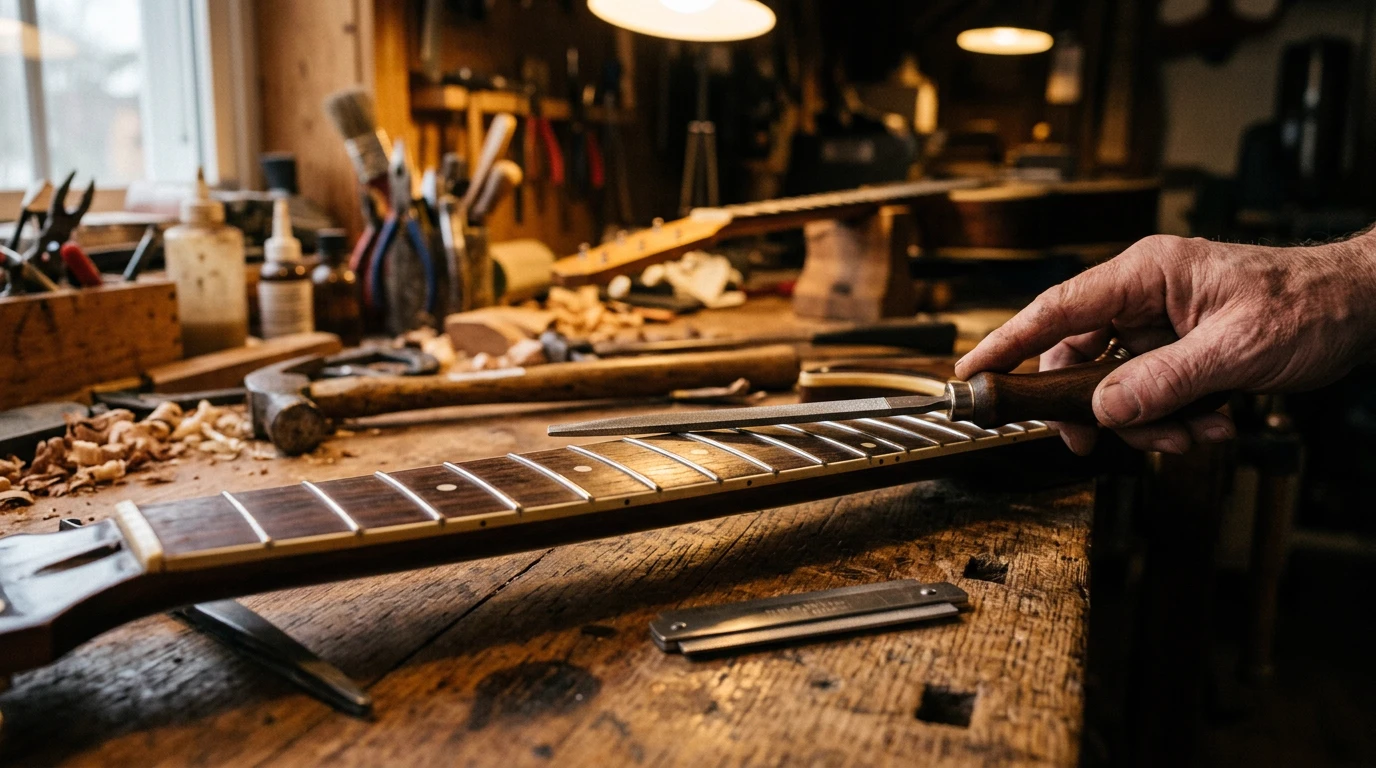
The truss rod is a steel bar running through the core of the neck that counteracts string tension. On most guitars, the adjustment nut is at the headstock end, inside a small cavity behind the nut, or accessed through the soundhole on acoustics. Here's what you need to know:
- Clockwise (tighten): reduces forward bow, flattening the neck.
- Anti-clockwise (loosen): adds forward bow, increasing relief.
Make quarter-turn adjustments only. I cannot stress this enough — a quarter turn on a truss rod moves the neck far more than you'd expect. After each adjustment, wait five minutes for the wood to settle and re-measure before making a second turn. The neck needs time to respond; wood doesn't snap into position instantly.
One honest warning: if the truss rod nut feels seized, clicks, or the neck is visibly twisted rather than bowed, stop immediately. A seized rod or a twisted neck is the one scenario where self-service is genuinely not recommended. That's a workshop job, and forcing it risks cracking the neck or stripping the rod.
Step 2 — Set the Correct String Action Height
How to Measure Action
Action height is measured at the 12th fret, from the bottom of the string to the top of the fret crown. I use a small steel ruler for this — digital callipers work if you have them, but a ruler graduated in half-millimetres is perfectly adequate.
For most electric guitars, a comfortable, balanced action is approximately 1.5 mm on the high-E string and 2.0 mm on the low-E string. Acoustic guitars work best between 2.0 mm (high-E) and 2.5–3.0 mm (low-E). These figures produce a balance of playability and tonal sustain that suits the majority of players. If you prefer high resonance and a bigger dynamic response from your pickups, go a fraction higher. If you're focused on speed and shred technique, you can push lower — but understand that lower action narrows the margin for buzz, so your neck relief needs to be spot on.
How to Adjust Saddle Height
On a Tune-o-Matic bridge (Gibson-style), the entire bridge sits on two thumbwheels — turning them raises or lowers all the saddles together. On a Fender-style bridge, each saddle has two tiny Allen-key grub screws that set its individual height. On a classical or steel-string acoustic with a bone saddle, the saddle itself is removed from the bridge slot, and material is sanded from the base to lower it, or the slot is shimmed with a thin strip of hardwood veneer to raise it.
Adjust in 0.5 mm increments. After each adjustment, re-tune the guitar to pitch (the tension change shifts tuning slightly) and test by playing every fret on both the low-E and high-E strings slowly, one at a time. Listen for any residual buzz, and check that the string doesn't choke out when you bend at the upper frets. If it buzzes, you're still too low. If bends die, you've gone too high.
Step 3 — Check Nut Slot Depth
Why the Nut Matters
If you've corrected the relief and dialled in the action but still hear a buzz on open strings specifically, the nut is almost certainly the culprit. A nut slot that has worn too deep causes the string to sit so close to the first fret that it rattles against it when played open. The fretted notes may sound perfectly fine, because fretting the string lifts it above that problem zone — but every open strum buzzes.
Here's the quick test I use in the workshop: press the string down at the 2nd fret and look at how much clearance the string has above the 1st fret. There should be just a hair of daylight — roughly 0.3–0.5 mm. If the string is touching the 1st fret crown while the 2nd fret is pressed, the nut slot is too deep.
Fixing a worn nut slot is slightly more involved than adjusting a truss rod or saddle. You can shim the slot with a tiny sliver of bone dust mixed with super glue (a trick I picked up years ago that works brilliantly on a budget), or you can replace the nut entirely. Pre-cut bone and TUSQ nuts are inexpensive and widely available. If you're not confident filing nut slots — and it does take a steady hand — this is one job where the £35 restring service at The Complete Guitar workshop in Dundee includes a nut height check and basic correction as standard.
How to Use LuthierScan Pro to Confirm Your Setup Is Dialled In
Once neck relief and saddle height are set, the final piece of the puzzle is intonation — confirming that the fretted note at the 12th fret matches the 12th-fret harmonic pitch. If those two pitches don't agree, the guitar plays in tune on open chords but drifts progressively out of tune the higher you go up the neck. It's a subtle problem, but once you hear it, you can't un-hear it.
Standard clip-on tuners aren't sensitive enough to detect the small pitch deviations — typically 1–3 cents — that indicate an intonation error. This is where I'd point you towards the LuthierScan Pro app (available free on the Google Play Store). It provides strobe-grade tuning accuracy to within 0.01 cents — the same level of precision I rely on at my own workbench, without needing dedicated bench equipment that costs hundreds of pounds.
The process is simple: pluck the 12th-fret harmonic and note the reading. Then fret the 12th fret normally and pluck again. If the fretted note reads sharper than the harmonic, the string's speaking length is too short — move the saddle backwards (away from the nut). If the fretted note reads flat, the speaking length is too long — move the saddle forward (towards the nut). Make small adjustments, a quarter turn on the intonation screw at most, re-tune to pitch, and recheck. Repeat for each string individually, working from the thickest to the thinnest.
This is the check that separates a good setup from a great one, and it's genuinely satisfying when every string reads dead-centre on the strobe display.
When to Call a Luthier Instead
I'm a firm believer that most players can handle the adjustments described above. But I'd be doing you a disservice if I didn't flag two scenarios where a workshop visit is the smarter decision:
Uneven or worn frets. If individual frets are visibly worn, chipped, or sitting at inconsistent heights, no amount of relief or action adjustment will eliminate buzz from those specific positions. This requires a fret level (where the tops of all frets are filed to a uniform plane and then re-crowned) or a full refret. Both are precision jobs that need proper files, levelling beams, and experience. This isn't a DIY task.
A seized or maxed-out truss rod. If you've reached the end of the truss rod's adjustment range and the neck still has too much or too little relief, the rod may need replacement, or the neck may have a structural issue. Forcing it further risks permanent damage.
The Complete Guitar workshop in Dundee offers a full setup, calibration, and clean for £95 — a single appointment that covers every adjustment in the correct sequence, including a strobe-grade intonation check, a fretboard clean with Clarity Wash, and a conditioning treatment with Resonance Balm. For players in Dundee and across Scotland, it's the benchmark to compare your own DIY results against — and honestly, it's what I'd recommend if you've worked through this guide and the buzz persists.
Post-Setup Care: Don't Skip This
A setup is the perfect moment to clean and condition the fretboard, because the strings are already off and the full wood surface is exposed. Sweat, dead skin, and grime build up between the frets over months of playing, and that corrosive residue accelerates fret wear — which brings you right back to buzz problems down the line.
I use Clarity Wash (£9.99) on every instrument that comes through my workshop. It's plant-based, pH-neutral, and free of silicones and d-limonene, so it's safe on nitrocellulose lacquer, polyurethane, and vintage finishes. Apply it to a lint-free cloth — never directly onto the guitar — and wipe between and along the frets to lift the grime.
After cleaning, follow up with Resonance Balm (£9.99) to restore hydration to the fretboard wood. Rosewood, ebony, and pau ferro are all unfinished, open-pore tonewoods that dry out — particularly in the UK, where central heating in winter strips humidity from the air. A well-conditioned fretboard doesn't just look better; it stays dimensionally stable, which means your setup holds for longer between adjustments.
Both products are available individually, or together in The Complete Guitar Care Kit (£18.99), which includes recycled microfibre cloths for safe application.
Quick Troubleshooting Reference
| Symptom | Most Likely Cause | First Adjustment |
|---|---|---|
| Buzz at low frets only | Too little neck relief | Loosen truss rod (anti-clockwise) |
| Buzz at high frets only | Action too low at saddle | Raise saddle height |
| Open string buzzes only | Nut slot too deep | Shim or replace nut |
| Buzz across all frets | Combination issue | Start with neck relief check |
| Buzz only above 12th fret | Intonation issue or high fret | Check with LuthierScan Pro; book fret level if worn |
The Setup Sequence, One More Time
If you take one thing away from this guide, let it be the order:
- Neck relief — get the bow right first.
- Action height — dial in the saddle once relief is set.
- Nut slot depth — check and correct only if open strings still buzz.
- Intonation — verify with LuthierScan Pro to finish.
That sequence is the same one I follow on every guitar that hits my workbench, from a £150 beginner Squier to a 1960s Gibson ES-335. The tools change, the principle doesn't. You've got this.
David Aitken is the founder of The Complete Guitar, a luthier workshop and guitar care brand based in Dundee, Scotland. For hands-on setup assistance, book a restring (£35), deep clean and hydrate (£65), or complete setup, calibration, and clean (£95).
About the Maker & Workshop
Written and formulated by David Aitken. Every care formula and calibration protocol is developed through hands-on bench experience at The Complete Guitar workshop in Dundee, Scotland, dedicated to making every instrument play 1% better every day.
Luthier Protocols
Recommended Bench Guides
Setup Sequence
The Correct Guitar Setup Order
Step-by-step T.R.A.I.N. calibration framework.
Finish Preservation
Nitrocellulose-Safe Cleaner Guide
Why commercial silicones cause milky hazing on vintage lacquer.
Tonewood Science
Why Lemon Oil Dries Out Fretboards
Botanical lipids vs petroleum mineral distillates.
Tuning Geometry
Why Your Guitar Nut Matters Most
Solve tuning drag, friction ping, and open-string buzz.
Equip Your Workbench
The Apothecary Awaits.
Don't let subpar chemicals ruin your instrument's finish. Secure the luthier-grade formulas discussed in this guide.
Visit The Apothecary →Dundee Workbench Calibration
Need hands-on bench calibration? Book The Complete Restring (£35), The Complete Setup (£95), The Complete Fret Service (£115), The Complete Nut Service (£50), or arrange diagnostic assessment through our Dundee guitar repair bench with complimentary doorstep collection and return across Dundee, Broughty Ferry, and Monifieth.